Installation Instructions
Brick Installation
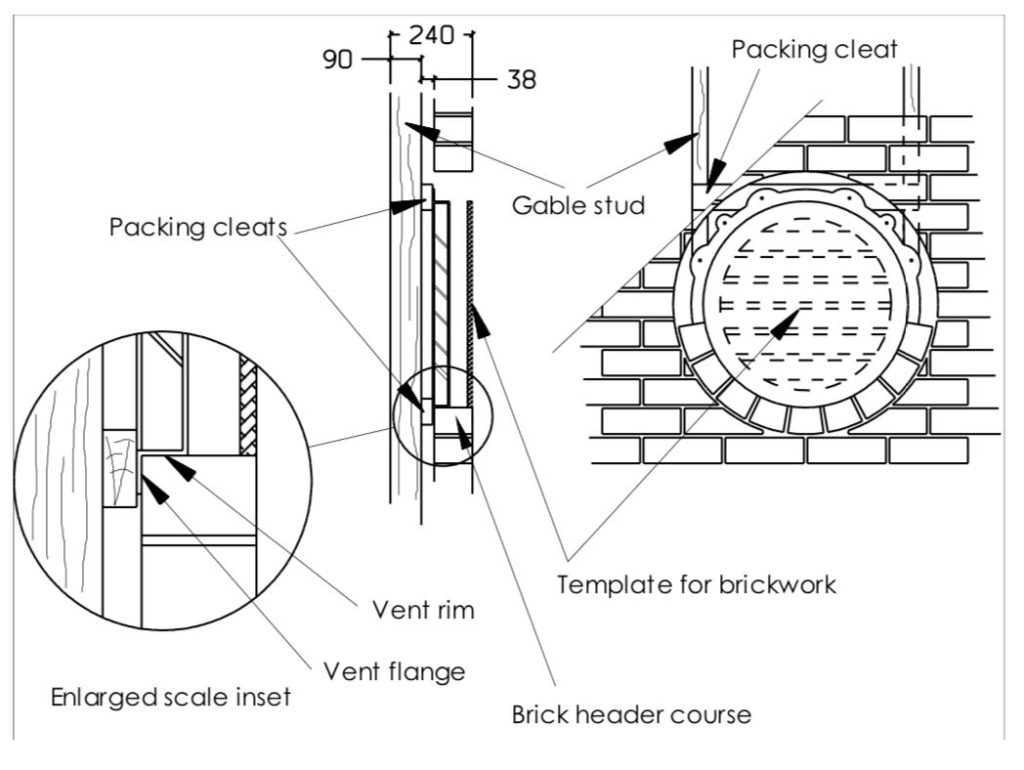
Brick openings for gable vents are constructed using a template to position bricks.
- Remove lock on finishing ring from vent.
- Mark out the inside shape of the lock on finishing ring on appropriate material for the template (particle board).
- Cut out template.
- Lay a header brick at the bottom centre of the vent position and set rim or vent on header. This gives accurate location of vent.
- Remove vent and fit two packing cleats 75 x 38mm horizontally to front of gable studs. Packing cleats must bring vent flange to meet back face of bricks.
- Level vent and nail or screw (M4.5 mm maximum diameter) vent flange to packing cleats.
- Bring up wall and build brick header course around vent to the halfway mark.
- Place template in position level with outer face of wall and complete the shape around the vent and template.
Cement Sheet Cladding
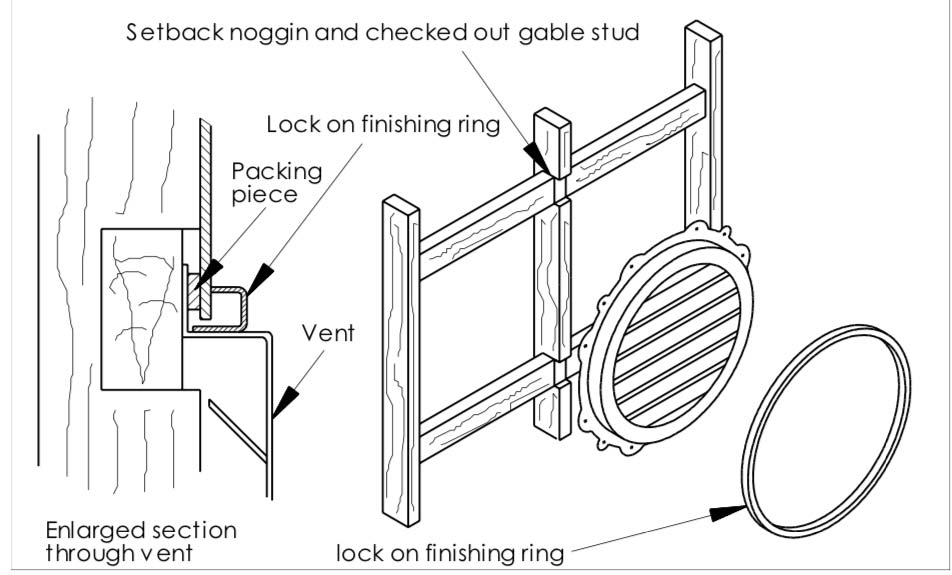
Due to thickness of this cladding, it is necessary to use noggins set back from the front face of the gable studs.
- Remove lock on finishing ring from vent.
- Use the inside shape of this ring to mark out the location of the opening in the wall cladding.
- Cut opening in cladding 5 to 10mm larger than marked out, ensuring that studs are not damaged.
- If vent is to be retrofitted, remove cladding in the vent area.
- Fit noggins in place between gable studs. These must be set back 6 to 10mm depending on thickness of cladding.
- If studs interfere with placement of vent, check out the areas of interference to the same depth as the noggins.
- Once a flat area for vent has been created nail or screw (M4.5mm maximum diameter) vent flange to noggins/studs.
- The front surface of the vent flange must now be packed out to the same level as the front of the studs. This can be achieved by placing thick beads of silicon around the front of the flange or by using adhesive to fasten packing pieces of timber or masonite to the front of the flange.
- Install cladding.
- Install lock on finishing ring. Ensure that the cladding is not pushed out of alignment when pushing the ring into place.
Weatherboard Installation
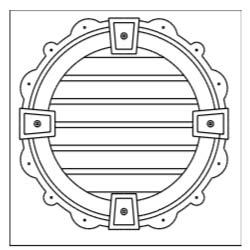
Keystone Installation
- Position Keystone and drill through vent with drill to suit screws supplied
- Screw keystones into place
- Snap screw coverplates into place
NOTE! Thick wall cladding will prevent Keystones from seating properly. Use a utility knife to cut away side of Keystone and remove any excess material.
Please feel free to download the GableMaster Vents Installation Guide
(Right Click, Save Target/Link As)
Master Series
